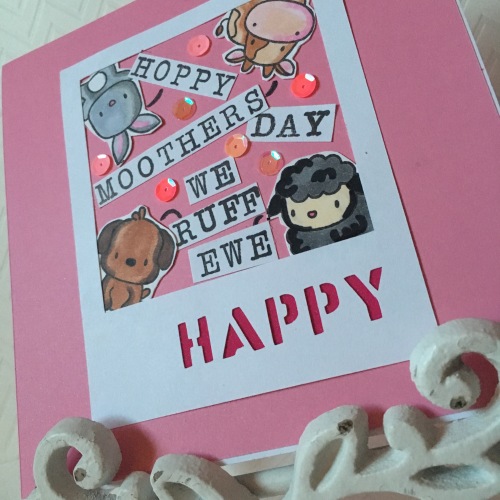
Handmade Card: “Hoppy Moother’s Day, We Ruff Ewe.”

Hello Paper Crafters!

Although my first post for a handmade Mother’s Day card was quite early, we are so much closer now (where does the time go?!).  I hope you enjoy this greeting card, it was really fun to make.
IMG_9685

I was staring at my Mama Elephant Lunar Animals stamps last weekend wondering what I could come up with as an idea for a Mother’s Day Card and came up with this: Hoppy (bunnies hop) Moothers (cows moo) Day, We Ruff (Doggies ruff) Ewe (a lady lamb).  So it was decided, I started stamping the four little darlings out in preparation to use my new brush markers.  Colouring is just so therapeutic!

IMG_9461

Next, I was trying to think of ways to arrange these little darlings into a scene with my chosen saying.  I thought maybe a cute lil’ barn?  A green, luscious field?  Naw!  I went with some cute lil’ polaroids.

IMG_9597

For this greeting card you will need the following supplies:

  • Mama Elephant Lunar Animals Stamp Set
  • Stamp Pad
  • Cardstock (white and chosen colours)
  • Markers, or your colouring weapons of choice
  • Scissors
  • Polaroid Template (I purchased my template from the Silhouette Design Store)
  • Glue
  • Alphabet stamp set (I used this stamp set I got at Michaels that click together and apart to create words) – or if your calligraphy skills rock totally just write the words out!
  • A few sequins

IMG_9698

Stamp, colour,  and cut out your lil’ critters.  Get your polaroid frame ready (I used my Cameo for this) and glue your little friends to the four corners of the frame.  Now that the animals and frame should be one piece, attach it with glue to the front of your card.  Stamp, cut, arrange and glue your words to form the phrase on the card.  Lastly throw on a few sequins, because well, you only live once and there should be more glitter and sequins in everything, period. (Ohh man did I just #yolo about glitter and sequins!?)

IMG_9687

Anyways, back on topic.  Just plain ol’ cute right!?  I love this Mama Elephant stamp set and have used it quite a few times already on a few card projects.  The possibilities are endless.  I think this is my favourite card I’ve used them on to date though.

IMG_9699

What handmade greetings cards have you dreamt up with this stamp set?  How about Mother’s Day cards in general as well?  I’m curious and would love to see your work, so please leave me a comment so I can check out some of your paper craft adventures.

Until next time fellow homemade card lovers!

Warmth,

Kim

Handmade Cards & Photography

Hello Card Crafting Friends!

Today was a fun and relaxing day.  I took a much needed staycation day today.  I spent the morning at the spa, wandered around Michaels (yay!), and cooked a wonderful dinner for my husband and I (with fresh baked bread, or course).  So let’s go back to that magical word “Michaels”, one of my favourite places in the world.  It’s one of those stores you walk into to get one, and one item only, and then two hours pass and you leave with 294,349,304 other items.  The. Struggle. Is. Real.  Today’s retail therapy trip to Michaels was to pick up supplies for photographing my handmade greeting cards.

IMG_9536
I’ve been doing some research on taking photos of my newly minted cards.  I’ve been so inspired by some bloggers and instagrammers.  Not only are their handmade cards  wonderful, so are the photos they take of their work.  I got some great inspiration from Maria Russell’s blog.    I’ve found through my research that it’s quite easy to take
some great shots of your work and it doesn’t require a lot of expensive equipment.  For example, this Hubpage gives some great tips.

IMG_9522

Here’s my take on greeting card photography.

For this card making idea, you will need:

  • Studio Tri-fold with one of the folds removed (I got the one above at the Dollarstore)
  • Neutral coloured scrapbook paper or card stock
  • Photo frame/easel/plate holder of choice
  • Some natural light
  • A handmade greeting card
  • A camera (my weapon of choice is my iPhone 6)

I went with this cute little rustic looking plate holder that I scored on my Michaels run today.  I figured this would go great with my neutral backgrounds (the paper I also got at Michaels).

Set up your now two-fold on it’s side and line up and glue your chosen paper or cardstock to both sides.  Place your chosen card holder in it’s newly created scene and add your handmade card creation.  Now get ready to be part of the paparazzi!  I’ve found from my research and personal experience today that natural light is the best.  Flash doesn’t do your work justice, trust me.

IMG_9529

In a nutshell, here are some tips I’ve found that work well:

  • No expensive camera equipment is necessary – most of us have camera phones 😉
  • Use a neutral background
  • Pick a location with bright natural light (or head outside!)
  • Prop your card up (frame/easel/plate holder) to get a good angle of your photo

IMG_9532

So there you have it!  I hope you picked up some tips on taking photos of your newly created paper crafts.  Do you have any tips on photographing your handmade greeting cards?  Be sure to leave me a comment with your tried and tested tips.

Warmth,

Kim

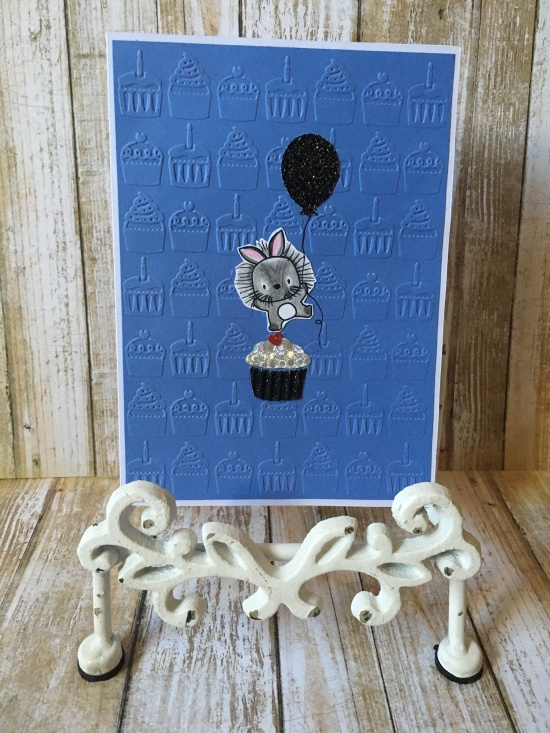
P.s. If you are wondering about the card I featured here, it’s a birthday card I made for my husband.  It’s a Mama Elephant stamp that I morphed to resemble our bunny @banjothebunny.  I also used my Martha Stewart cupcake and balloon paper punches, and my Cuttlebug cupcake embossing folder.


Sympathy Handmade Card

Hello Card Crafters!

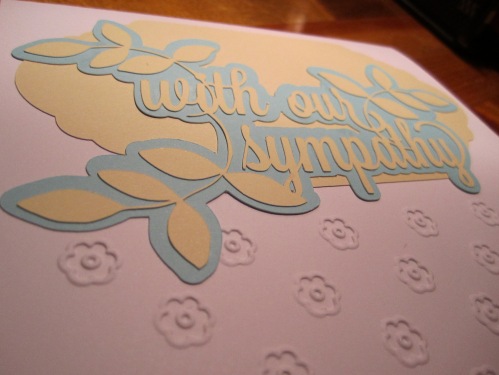
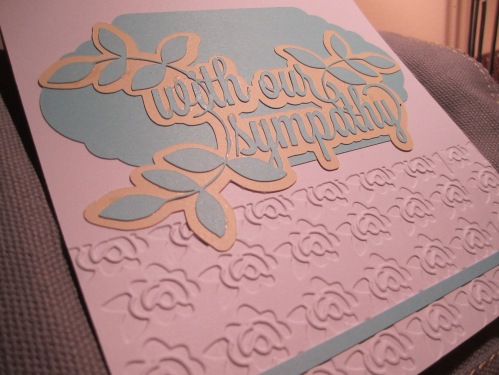
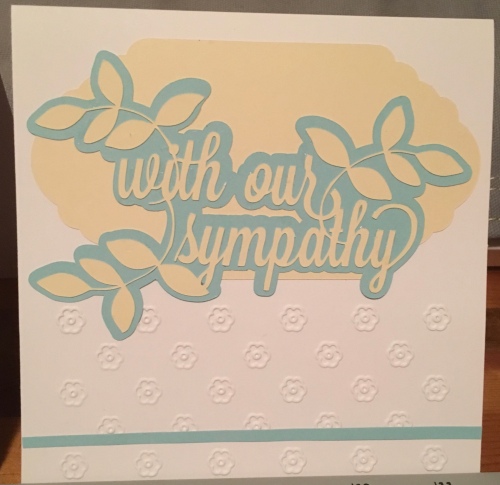
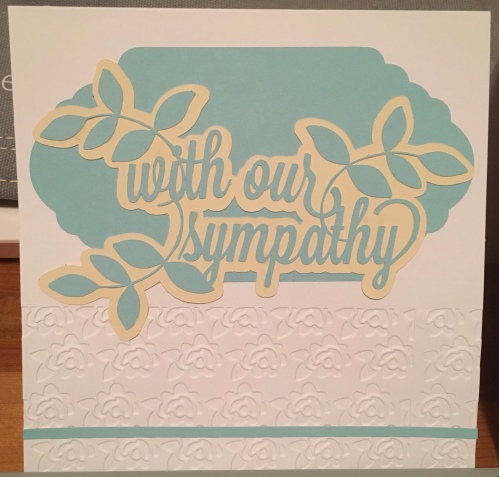
I wanted to share a handmade card that is close to the heart as it was a sympathy card for a friend of mine that lost a loved one.  I made this card using my Silhouette Cameo.  It’s the first time I’ve made a card of this nature so I didn’t have any stamps that coordinated with this card theme.  So I thought “why not check out the Silhouette store”, and viola! I found this this card design from Bits of Paper (you can also just search “sympathy” in the Silhouette online shop as well).

IMG_6967
Although the original design for this greeting card was beautiful, I was inspired by another bloggers work, Kristina Werner.  I really liked how she added dimension to the bottom of the card with an embossing folder and the coordinating strip of card stock.  I also really loved her design period, so I have also purchased and downloaded her greeting to use in future cards.  Anyways, back on topic, I created a hybrid of these two lovely ladies cards:

IMG_6989

You will need the following card making supplies:

  • Chosen Sympathy Design (you can purchase and download either of the ladies work Bits of Paper or Kristina Werner)
  • Card stock of choice (for the two above i used white, and pastel yellow and blue)
  • Paper Trimmer
  • Silhouette Cameo
  • Glue
  • Embossing folder and Embossing Machine (I love my Cuttlebug)

“Cameo” your chosen design and arrange it according to the colour scheme you went with.  Emboss the lower portion (just below the half-mark) of your card).  Trim a coordinating colour strip of card stock (I just eyeballed the strip).  Glue all of these coordinating paper pieces to your card.

IMG_9254

I must admit, I’m more into stamps but the odd time I like to break out my Cameo (perhaps I maybe just need to get better at using all of its functions…?), but I like how this design turned out.  And I was happy to give something to my friend that I picked out and card crafted myself.

IMG_9253

What’s next for me?  Well I’ve been reading up and getting some inspiration on card making ideas from other card crafter blogs.  I’ve read some pretty good content on taking photos of finished greeting cards.  So I will be practicing my photography skills for my next project and will share with you the knowledge I have come across.  I still can’t get over how amazing some peoples card photo’s turn out so I am excited to get started on this.

Also, I’ve ordered some more card making supplies that revolve around babies and new arrivals (because, well, it seems everyone and their dog is expecting these days!  Jokes, I am so happy for my expectant friends – I can’t wait to be the crazy bunny auntie that crafts her own cards and drives an oh-so-boxy white Nissan Cube – wait a second maybe I’m related to the Magic School Bus Driver?!).  I am really getting off topic here…  Anyways, so my next focus once these items arrive will be to paper craft some cute lil’ greeting cards for my expectant friends.  I was extremely torn between the Lawn Fawn and Mama Elephant stamp sets, and don’t worry I didn’t buy both (even though I wanted to).  You will have to check back to see which set I went with!

Warmth,

Kim

P.s. Even though I already chose and ordered just the one stamp set, the other one is still on my mind…


SSSCK: Mother’s Day Card

Hello Card Crafters!

So I received my first Simon Says Stamp subscription package a few weeks ago.  I ate the lollipop right away (obvs) but I just got around to paper crafting with this card kit now.  This package was so versatile with some strong vibrant colours, perfect for spring.

IMG_9287
For my first subscription package I was thrilled.  Upon first look many handmade cards  can be made from this set: Valentines, Birthday, Thank-you, simple greeting cards.  Projects truly are endless with this kit!  I also picked up some new brush markers at Homesense last weekend.  I’ve been eyeing those Copic markers that a lot of card crafters use but I couldn’t justify the price just quite yet.  Maybe with more experience I will slowly start building my marker collection, but until then these will work just fine I’m sure.

IMG_9295

New! Yay!

I don’t have any special occasions coming up in the next little while so I decided to get a head start on my Mother’s Day cards.  I have two amazing mom’s so I was able to make two similar home-made cards.  I know Mother’s Day is a few months away but I figured it’s never too early for some inspiration.

IMG_9422

For these handmade cards you will need:IMG_9374

  • The April Simon Says Stamp Card Kit (SSSCK) – you can buy all of the supplies separately from their online shop as well.
    • You can also just use solid and patterned cardstock, stickers and stamps to create your own handmade card
  • Paper Trimmer
  • Glue
  • Small 3D Dot Foam Adhesive Squares
  • Markers
  • Mother’s Day stamp
  • Stamp Ink Pads

The most time consuming part of this card creation was choosing the patterned paper and coordinating stickers.  Everything was just so lovely!  After I chose the paper combinations I eyeballed the sizing and trimmed my paper pieces (3 in total – the large “XOXO” paper and the smaller half and half paper that is glued at the top of the “XOXO” paper, and the sentimental greeting to the right).

IMG_9391

I glued the two patterned paper pieces to the card and attached the sentimental piece of paper with some 3D foam squares (note: don’t stick the foam stickers where the cute lil clip will go if you plan to let your loved one know that they can re-use the clip as a bookmark <3).  Attach your chosen stickers (I stamped the “Love You” greeting on the label sticker from the kit), and add the cute lil clip onto your sentimental greeting.

IMG_9402

I added some detail to the inside of these cards.  I really liked how they turned out!  Perfect for Spring, and perfect for Mother’s Day!  I used the lines and flower stamps included in the kit and coloured the flowers with my new brush pens.  Stamp your greeting and you’re done!

IMG_9396

So there you have it, a Mother’s Day card!

IMG_9421

I can’t wait to see what comes in next months SSSCK.  Did you create a greeting card with this month’s card kit?  Leave me a comment so I can check out your blog and creations!

Warmth,

Kim