Why Hello There Paper Crafters,
Let me start off with saying I’ve been so busy. Summer is in full swing and I can’t keep up with anything in life it seems. With two vacations under my belt thus far and Stampede quickly approaching I wanted to make sure I get a blog post in before my life becomes more of a Stampede (see what I did there, bwahaha)!! Alright, so a very important day happens in June every year, Father’s Day! So today’s post is all about dad. Let’s drink to him, and that!

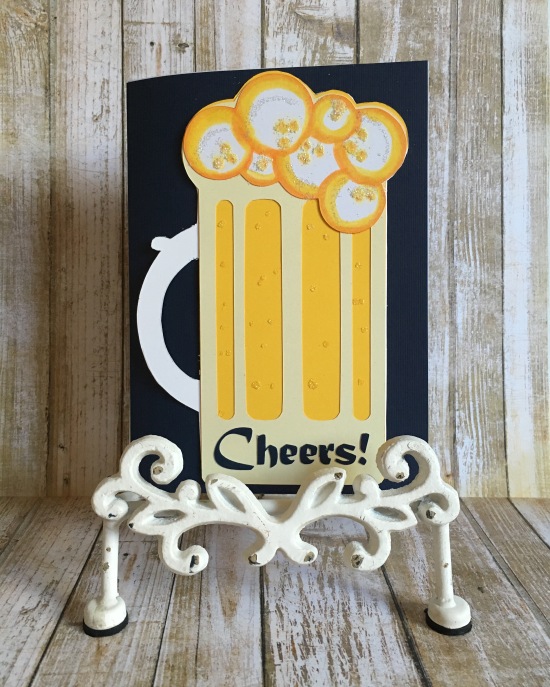
So, as you can see I went with a beer theme. Which is “different” than my recent work (my recent work has included a lot of stamp work), but more closer to my work that I originally started out with (using stencils and designs). I actually set out to use my Silhouette cutter for this project. I was on a mission.
So I opened the Silhouette Studio and off I went. So I searched “Fathers Day” and found this project by JMRush and loved the look of the beer mugs. So I proceeded to purchase that project and started thinking up what the card will look like. However, side note, because I’m all about making things harder then they should be I actually found (now that it’s one month later) another project template here (also note it’s by the same designer, JMRush – and don’t worry I purchased this project today so I don’t forget about it the next time I want to make one of my beer-loving friends a card) that would have been perfect for this card and would have required far less manipulation. Sigh. Well, you’re welcome!
So after playing around with the original template (I can’t even harbour a guess at how long it took me to manipulate it to the correct size I wanted it) – yay for learning how to use my Cameo! In the end, I came up with this beer mug with “hoppy bubbles”.

And yes, I added glitter (because there is nothing more manly than glitter, I’m sure you agree):

For this handmade greeting card you will need:
- Your chosen stencil of a beer mug (or free drawn if you are oh-so talented), or the Silhouette Studio project templates here (for you adventurers like me this one, or for the more practical and sane crafters this one – see above my long winded side-note).
- Cameo (or scissors if you are using a stencil or hand-drawn)
- Card stock
- Colouring weapons of choice
- Glue
- GLITTER!!!
Cut out your beer mug stencil. Prior to assembling all of the layers, I coloured in the “hoppy bubbles” with my brush markers. Arrange all of the mug layers so that they overlap (refer to photos above and below) and add chosen “greeting”. Glue all layers and greeting together. Using a glue stick (I used a glue pen above but I think a stick would have worked better as I had to press down the glue and glitter once I had everything on the card stock) add accents of glitter to the “beer windows” and “hoppy bubbles”. Let everything dry overnight and paste your finished mug onto your card. I finished the card off by stamping a greeting of “Hoppy Father’s Day” on the inside, because, well, it was just so fitting for the card.

And there you have it! A fun card for the beer drinker in your life. I hope you enjoyed it! What did you dream up for your father’s day cards? Until next time!
Warmth,
Kim
